
Translations editor ✍️
The Translations Editor is one of Ethnio's most powerful features for global research teams. Whether you're a Research Ops lead setting up a multilingual study, a Program Manager coordinating across regions, a solo researcher running studies in multiple regions, or a native-language expert reviewing content in your country, this guide walks through everything you need to know.
Get started by turning on Localization inside a study
Before using the Translations Editor, there are two key steps inside a template or stud:
Step 1: Study Plan > Key Elements > Localization
Go to your study plan, navigate to Key elements, and check the Localization checkbox. Once enabled, a Localization item appears in your study plan on the left.
Step 2: Study Plan > Localization
Head here next and there are two boxes where you set a default language and add translated languages. Ethnio automatically detects a participant's browser language and uses GeoIP to serve them the right language version.
🔗 Access for the Translations Editor
The Translations Editor lives at a direct URL tied to each study (e.g. ethn.io/translations/[study-id]/editor). When you or any collaborator or translator opens the link, any edits that are made are saved instantly and updated in the live study automatically.
To find the Translations Editor link for a study, go to the study's Localization tab in the Study plan and look for the Translations Editor button at the top of the page.
💡 Enterprise SSO tip: Translator seats are completely free and unlimited. Just share the study's Translations Editor URL and Ethnio handles provisioning automatically. No admin steps needed.
🗂️ Navigating the Editor: the section dropdown
In the top-left of the Translations Editor, there's a dropdown that lets you jump to any section of the study. This is how you focus your editing on specific content. The full list of sections includes:
Metadata, Invite, Questions, Thanks, 3rd Party URL, Scheduling Emails, Scheduling Reminders, Scheduling SMS, Scheduling Pages & Settings, Redeem Pages, Payment Methods, Incentive Emails, Consent Types, and All fields.
Incentive-related sections (Redeem Pages, Payment Methods, Incentive Emails) appear at the bottom of the dropdown. If you're running a compensation-only study where participants are simply being paid rather than going through a full screener, these are often the only sections you need to translate. You can completely ignore everything else in the dropdown.
🤖 AI translation: three engines, one click
One of the most powerful things about the Translations Editor is AI-powered translation built right in. Ethnio supports three AI translation engines, and the right engine is automatically matched to each language:
DeepL, which is used for languages where it performs best (such as Swedish and most European languages), Amazon Translate, which handles a wide range of world languages, and Google Translate, which covers additional global language support.
You don't need to choose which engine to use. Ethnio matches the best engine to each language automatically, and it's shown right in the editor when you click the AI translate button (the sparkle ✨ wand icon) on a language column.
Running an AI Translation
Click the sparkle/wand icon ✨ in the header of any language column. A panel appears showing which AI engine Ethnio will use for that language, and gives you three targeting options:
All visible rows translates everything currently shown according to the section you've selected in the top-left dropdown. Not synchronized translates only the rows where the source language has been updated since the last translation ran (this is the default and safest option for keeping things current without overwriting good work). Select specific rows lets you cherry-pick individual fields if you only need to re-translate a handful of items.
Hit Translate & Overwrite and Ethnio kicks off the job in the background. You can track it in the Jobs log (accessible from the top-right of the editor).
Manual Editing
AI translation is a great starting point, but native-language reviewers can edit any cell directly. Just click any translation cell to make it editable and type your changes. Edits save automatically. This makes the workflow ideal: run AI translation first to get all fields populated, then have your in-country expert or language stakeholder refine the tone, terminology, and cultural nuance.
📥 Import & export
The Import and Export buttons live in the top-right of the Translations Editor, right next to Jobs. These are designed for teams that want to manage translations in bulk using spreadsheets, or who are sending content to an external translation agency.
Exporting Translations
Click Export to generate a file containing all the translation fields for the study. The export runs as a background job, so you can download it from the Jobs log once it's ready. Export jobs are tracked under the Exports tab alongside AI Translation jobs.
Importing Translations
Click Import to upload a completed translation file. Ethnio accepts CSV, XLSX, or a Google Sheet URL. Field names go in the left column, language names in the header row. Use one of the provided templates on the Import page if you need a correctly formatted starting point.
⚠️ Out of sync rows
When you update content in the default language (for example, changing a screener question in English after translations have already been run), Ethnio flags the affected rows as out of sync. This is a safeguard to make sure your translated versions stay accurate when the source changes.
Here's how it works in practice: if your default language is English and you have French and Spanish translations, and you update one question in English, that same question will show as two out-of-sync fields (one for French, one for Spanish).
To see which rows are out of sync, use the Show out of sync fields toggle in the top-right area of the editor. When enabled, only the rows that have drifted from the default language will be shown, making it easy to focus your attention. Fixing them is straightforward: update the translation in any flagged cell, or run AI translation with the Not synchronized option to re-translate only those rows automatically.
Jobs for tracking AI translations, imports, and exports
Every AI translation job and every export is tracked in the Jobs log, accessible from the top-right of the editor. The log has two tabs: Exports and AI Translations. The AI Translations tab shows each job by language, fields translated, characters processed, which AI engine was used, the date and time, and status. Use this audit trail to know exactly when translations were last updated and which engine ran them.
Putting it all together: a typical workflow
Here's a quick workflow:
- Enable Localization in Key elements
- Set your default language, and add translated languages in Localization
- Run AI translation on all sections to get a baseline
- Share the Translations Editor URL with any translators or native speakers on your team to edit.
- Edit cells inline where needed or import/export.
- Use out-of-sync toggle to polish content changes across languages.
- Three AI engines to help
All about the Translator role
The Translator is a dedicated role in Ethnio, designed specifically for in-country language reviewers and translation specialists. Translator seats are completely free and unlimited on enterprise plans, making it easy to bring in as many native-language experts as your global study requires.
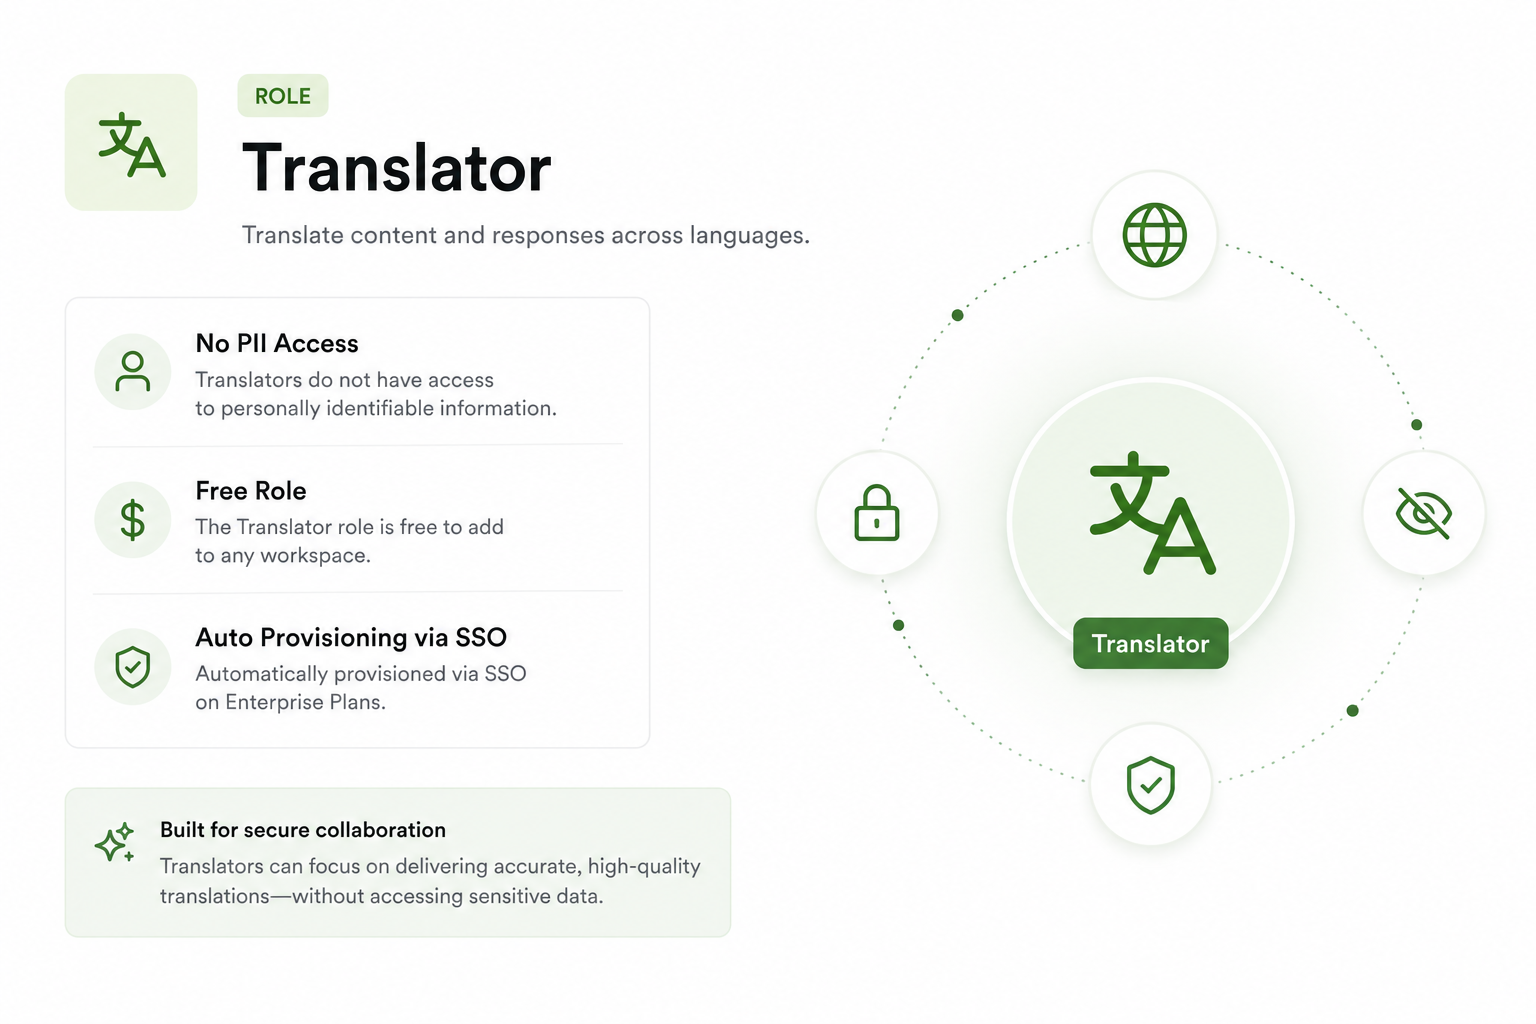
When someone accesses a study's Translations Editor URL, Ethnio automatically provisions them a Translator seat. They can see and edit only that study's translations, with no access to anything else in your account. The role is identified in the Roles section of your workspace with the Translator icon.